Here we show some of the possibilities when using Microsoft Power Point or other similar flowcharting applications to plan your trip. We use Power Point as it comes with our subscription to MS Office. If you don't have it, there are other free applications available to accomplish the same thing. An example is https://app.diagrams.net
We highly recommend using a flowcharting application during your initial trip planning. You can quickly and easily add locations and travel modes/times between locations. Color code locations where you plan to stay the night then add text to show the location name and your best guess at the number of nights. Add connecting arrows to show the direction of travel as well as text for the travel time and mode of transportation.
Once you research your activities, you can go back and update the number of nights you think you need at each location. Keep in mind your arrival and departure times as this affects the number of nights. Also, plan where you stay based on the amount of travel each day. We try to break up travel by staying in some interesting location along the way.

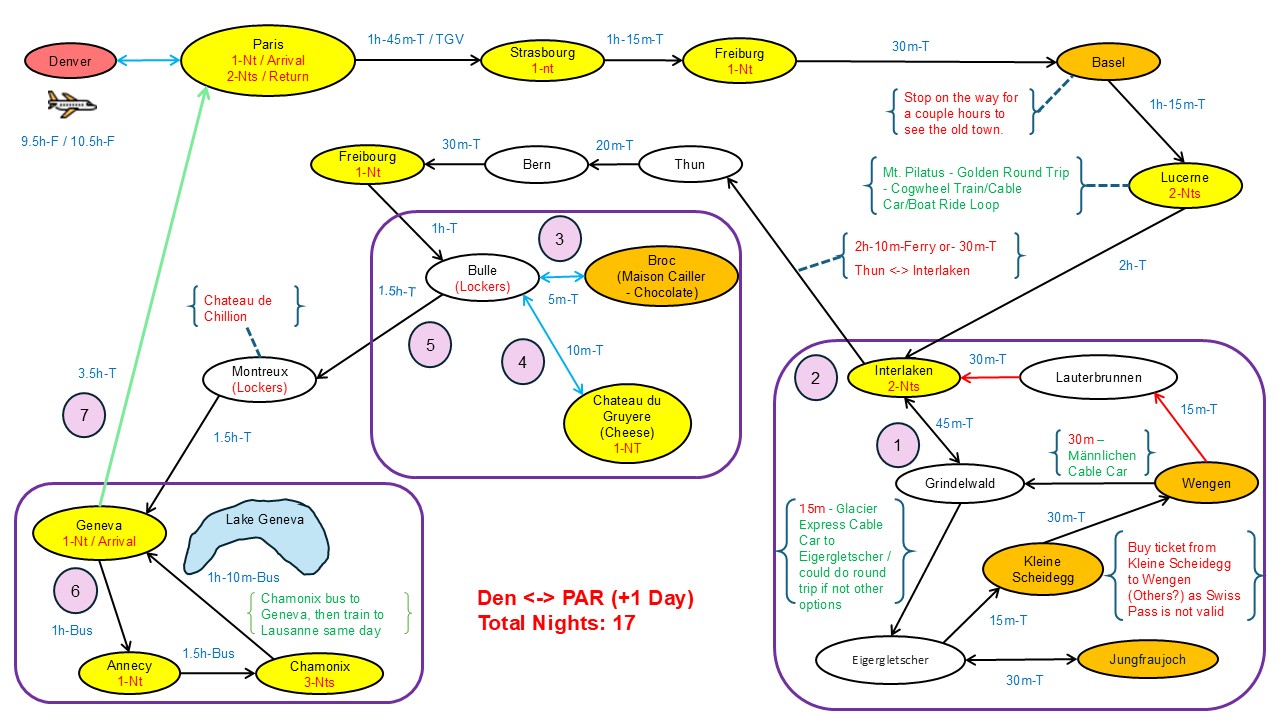
In the first diagram, we are staying 2 nights in Interlaken Switzerland and doing Jungfraujoch and other locations as a Day Trip. We my update this to spend more time as it's such a fun and beautiful area. We have been there in the past and stayed nights in both Interlaken and Grindelwald as well as traveled up the Schilthorn with stops in Gimmelwald and Trummelbach Falls, so we are skipping those on this trip but they are definitely places and activities you should include if you have never been there before.
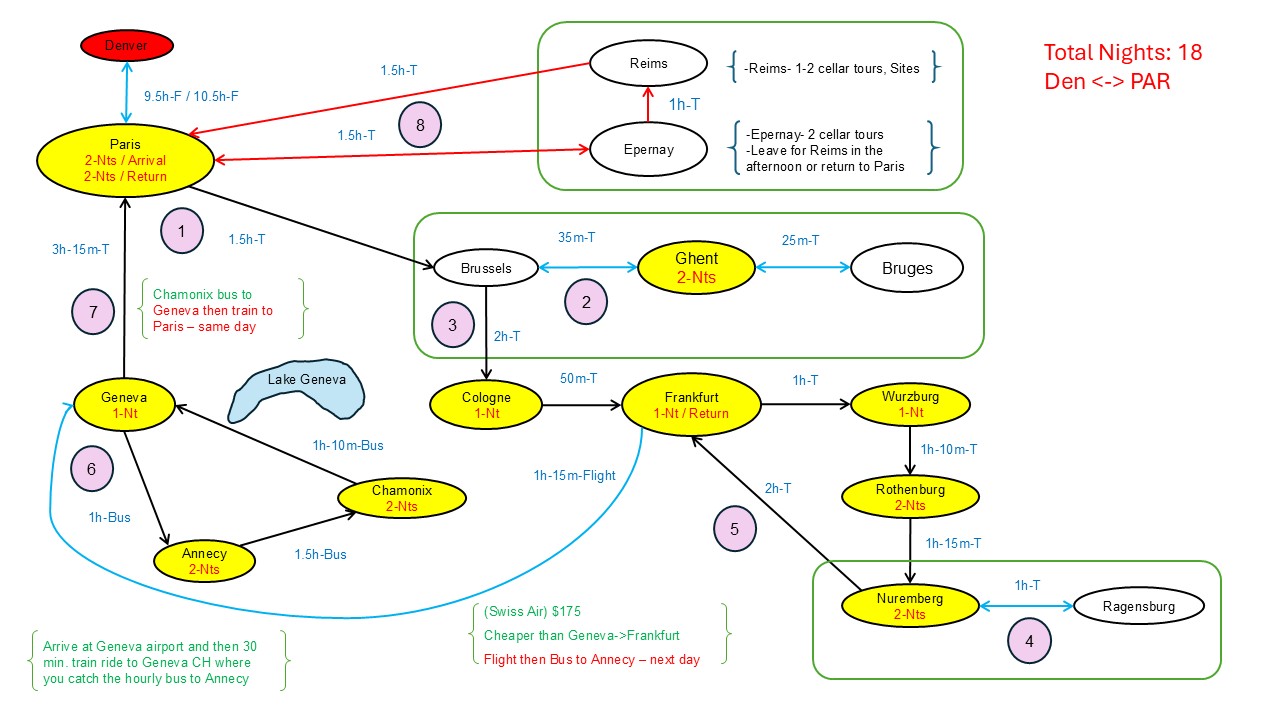
In the second diagram, we are planning to stay 2 nights in Ghent Belgium, passing through Brussels and only visiting Bruges as a Day Trip. We have previously stayed in both Brussels and Bruges, so on this trip we decided to pass through Brussels, perhaps only stopping for lunch before continuing on to Ghent. As Bruges is such a wonderful place, we will include it as a Day Trip from Ghent. If you have never been to those locations, we recommend staying a night in both Brussels and Bruges.
| Some high-level overviews of several different trip examples | |
| Here we Fly to Paris then travel by train to Strasbourg France. We then visit Freiburg Germany on our way to several locations in Switzerland with the highlight being the Berner Oberland area including Jungfraujoch. After that, we head to Broc and Gruyere Switzerland before Annecy and Chamonix in France. |
 |
| Flying to Paris then taking the Eurostar to Brussels then on to Ghent and Bruges. After that, we travel by train to some favorite places in Germany before returning to Frankfurt for a flight to Geneva. From there, we continue to Annecy and Chamonix France before returning to Paris. We also have the option to visit Reims and Epernay in the Champagne Region. |
 |
|
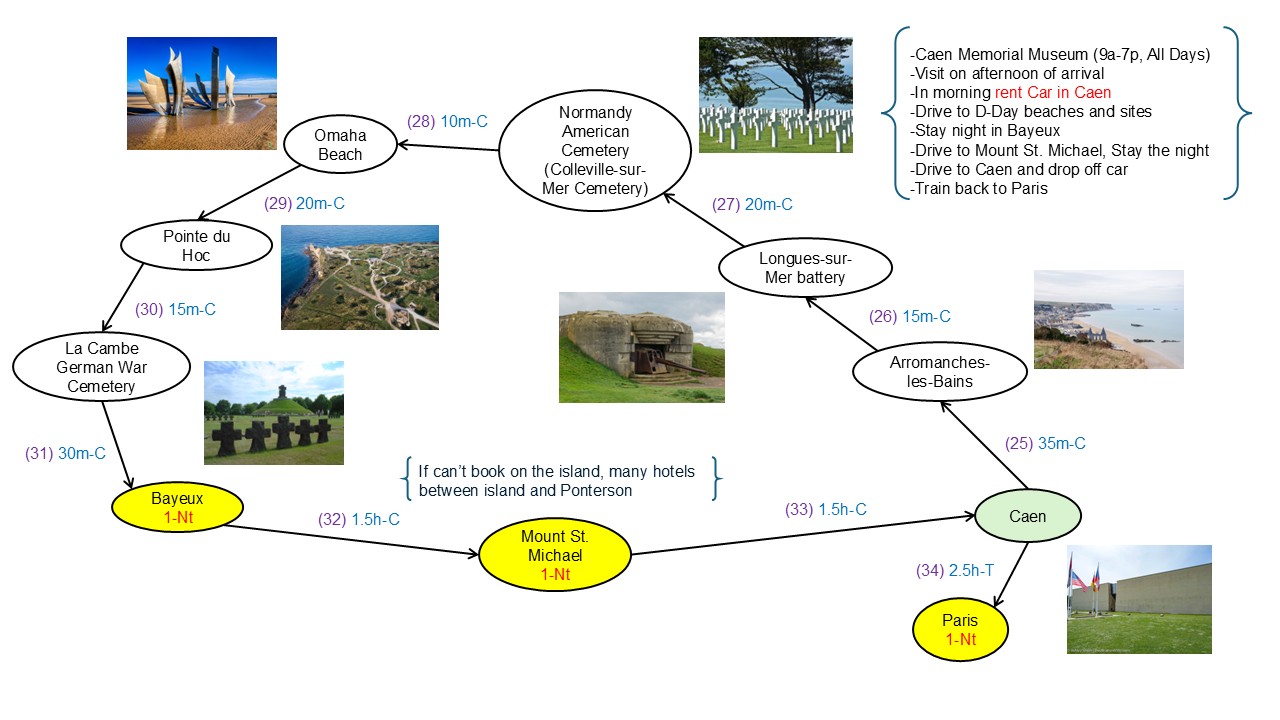
Normandy - World War II Sites including a stop at Mount St. Michael for the night. This shows travel time by Car between the sites. This is our initial planning example to give an idea of what may be possible. |
 |
|
This first step is extremely
important and you should spend as
much time as necessary to be sure
you have found the locations
you want to visit, the best
travel routes and are aware
of all there is to see and
do. The more time you spend on this step, the better off you will be, so don't rush. You don't want to take your trip and return home to find you missed something extremely important at a site you were visiting or another site close by. |
||||||||||||
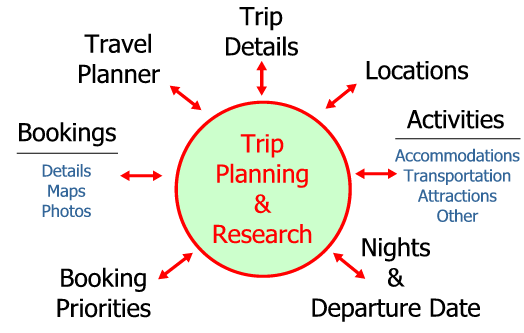
Step 1: Determine locations based on activities of interest
You will be researching locations and activities to create a list of possible places to visit based on the activities.
Make note of transportation options, travel times and in some cases the cost to travel between locations. Once you have solidified a list of locations and activities, you will use your best guess to determine the amount of time required at each location. Some locations may be considered day-trips, while others will require an overnight stay or a stay of several nights.
When you are considering a trip, the sky is the limit. Start by listing every location of interest. Research sites by reading, watching videos and using the internet. Search for things such as 'Berner Oberland Activities', 'Interlaken Sites', 'Castles by Bern Switzerland', etc. When you find something that interests you, create a location and make note of the sites or activity there. At this point, don't be concerned with the cost or transportation between locations. Later in the process, when you have gathered more information, you will be able to make more informed decisions on the locations you will actually visit and ones you will remove.
Step 2: Sites of interest and activities
Once you have listed your locations, make note of the activities for each location. You can add notes in brackets next to each location on your slide but a better idea may be to actually write them down on a separate piece of paper as your screen will more than likely become very congested as you begin connecting locations and adding travel information in the next step.
Activity research should also include
- If applicable, accommodation availability/affordability/location (makes sure you can easily reach your accommodations from your arrival point, that it's convenient to your planned sites and activities and it fits your travel budget)
- If you are traveling by train, note the arrival and departure locations
- If arriving by car, note parking areas and cost
Step 3: Connecting the dots - travel mode, time and cost
In this step, you will draw lines connecting the logical possibilities of travel between locations.
Use an internet search to find travel information between your locations such as 'Madrid to Toledo'. Along each line of travel, make note of the travel mode, time and cost if necessary. For example, along the line connecting Thun to Bern, write 30m/T (30 min. by Train).
Having this single high-level and comprehensive view of your locations with travel times allows you to quickly see the different travel options at a glance allowing you to more easily refine your routes. You will be able to make decisions on when to backtrack through a location to get to your next destination rather than going directly from your current location. In some cases, it may actually be quicker to backtrack to a place that has a high speed train rather than making multiple connections or taking a slow city train from your current location. You may see that travel between two points does not makes sense by train or bus due to the duration and that flying is your best option.
Travel between points may only be available by bus so you need to consider the time. If you plan on traveling by car, plan on $100/day average for car rental with full insurance coverage. It may make sense to pick up a car in one location and drop it off in another but there may be additional fees for this. See our tips page on Automobiles and other transportation options.
You may find that you plan to stay several nights in one location, while at other locations you may only stay a single night. You may choose to depart early in the morning for a daytrip to a new location, returning to your original location or on to a new location in the evening. The important thing to remember is to maintain a good balance of location time verses travel time.
Utilizing our Travel Planner, you can easily see a breakdown of your travel time for your entire trip as well as the amount of time you will spend at each location. As you are planning your trip, consider the location, sites and travel time to determine if it's worth taking the time to get there.
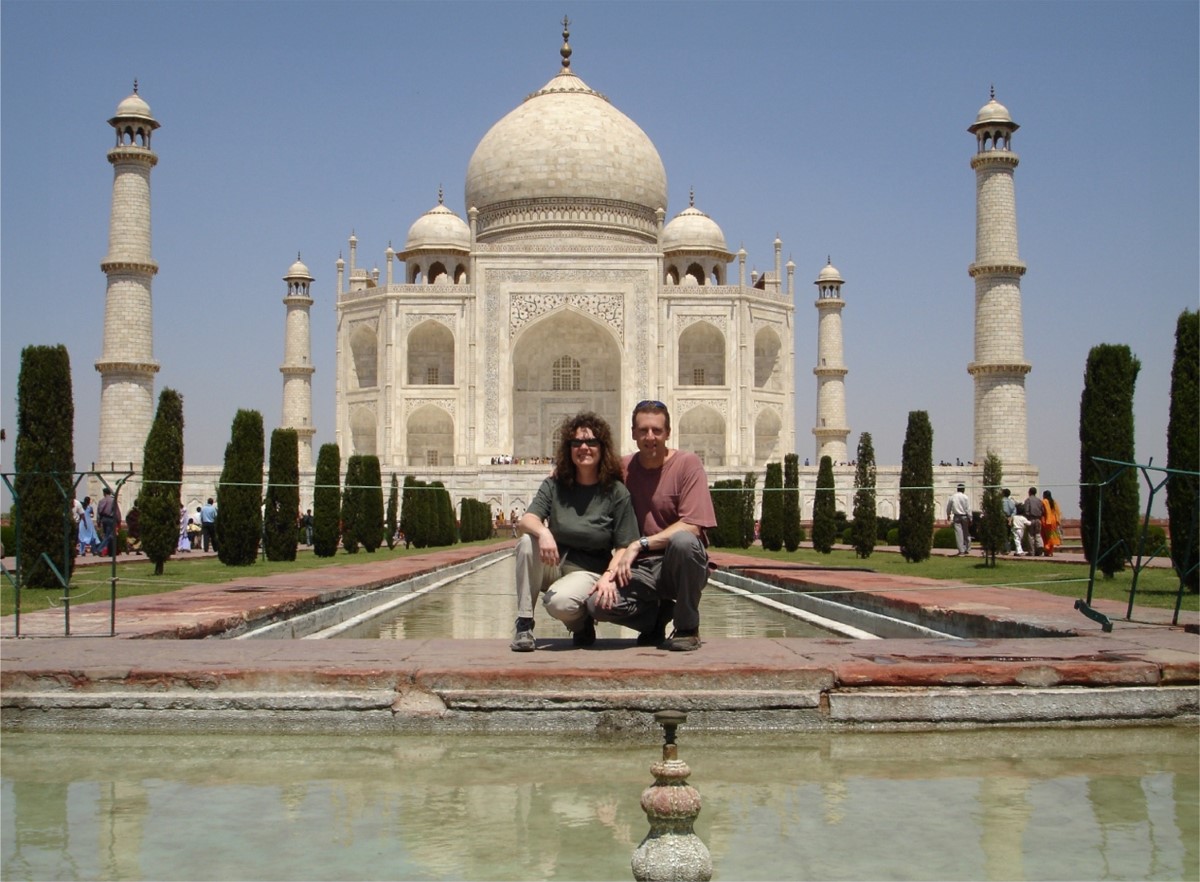
There are always exceptions. There are times when the site outweighs the travel time to get there, such as going to see the Taj Mahal in Agra India. You may travel several hours in a single day just to see it, but it's something you don't want to miss.
Taj Mahal Agra India
Step 4: How long to stay
Once you have solidified your trip itinerary and are happy with all you plan to see and do, it's time to estimate the amount of time required at each location to accomplish your activities. This is where you must use your best guess or judgment. At some locations you may want to relax and take your time while at others you may want to only spend a few hours and then be on your way. It's important to remember not to rush but to take time and enjoy where you are and what you are doing.
Consider your arrival time and the length of time required to travel to your next destination to determine the amount of time to stay. For example, if you arrive in the morning and have all day to explore, so you may only want to stay a single night. If you arrive late in the evening, you may need to stay two nights so that you have a full day to explore. If you plan on arriving at your next location by a specific time, this may limit the amount of time you have at the current location.
Determining the length of stay at each location will give you an idea of how many days will be required for your trip and any adjustments you need to make.
Step 5: The Trip Builder and Routes
When you are satisfied with your trip, you can being transferring your information to the Trip Builder.
After you have created your locations page, be sure the route makes sense. Try to avoid backtracking if possible although in some cases it may make sense as described above.
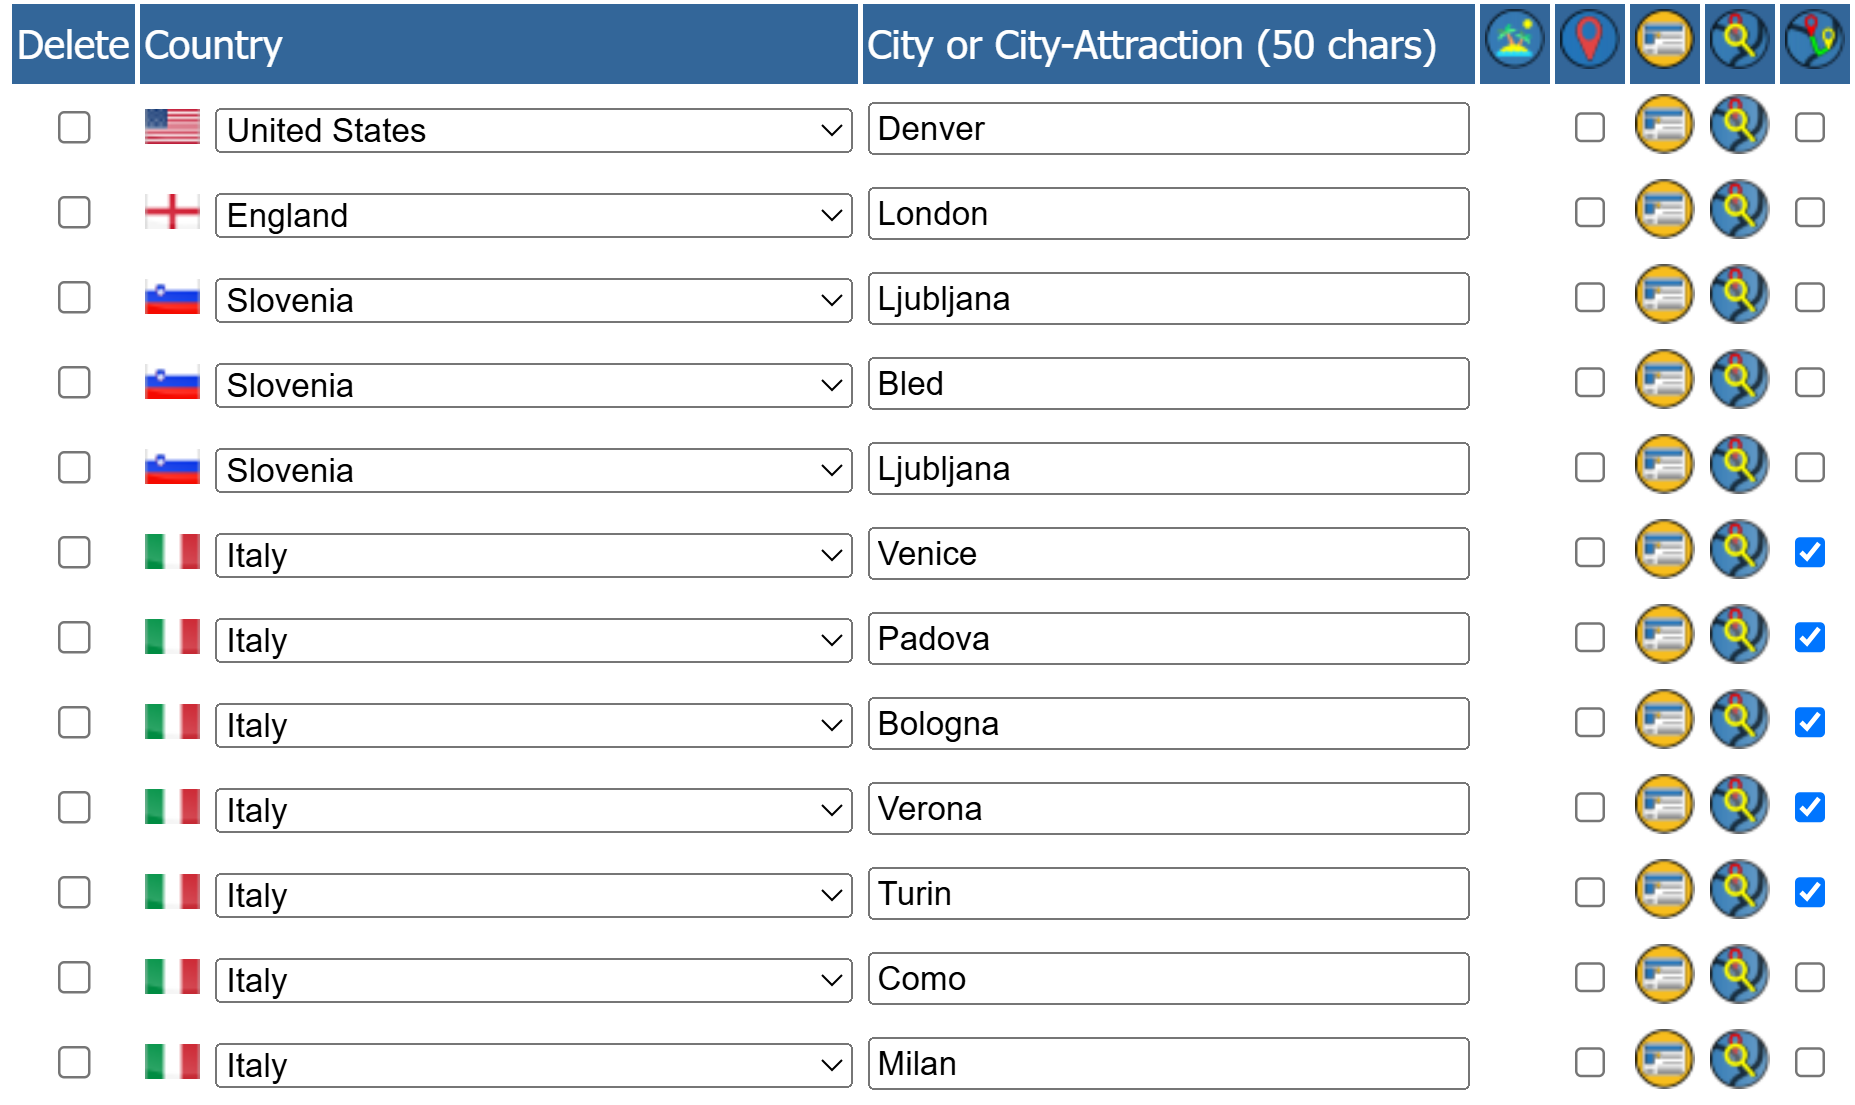
After you have added your locations, select your locations and then the
icon to view your route with Google Maps. Viewing the map, it may make sense to rearrange the order of your stops for more efficient travel times. For more info, see our Route Maps page.
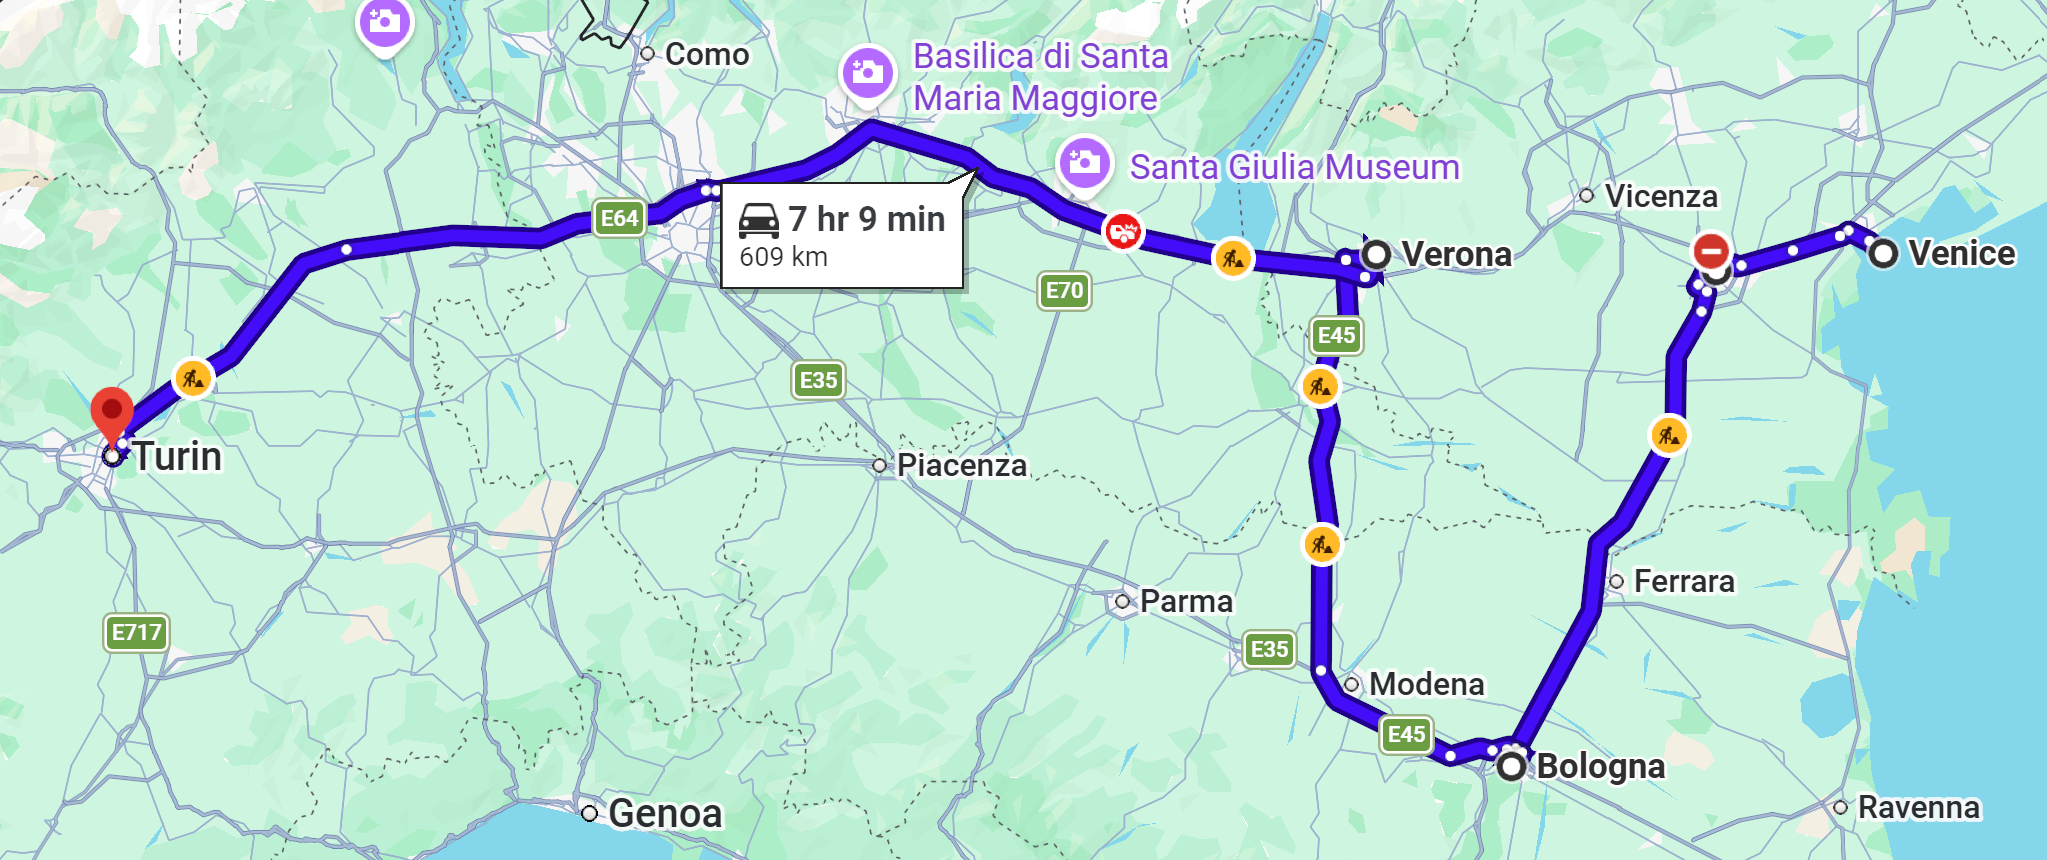
The below example shows a trip to Slovenia and then Italy. Several locations in Italy have been selected to show the Route Map between them.
Note that Google Maps shows Routes by car although we will be traveling by train. The goal is to show the sequence of locations to be sure they are in the best logical order and not the transportation mode.